

April 20, 2020
Dryer Repair
Dryers are relatively simple machines. Most of the complexity comes from the safety mechanisms meant to prevent shorts, overheating, tumbling with the door open, and excessive shaking. Everything else is simple. A heating element warms of the dryer, the drum spins, and hot air (along with lint) flows out through the vent. In the process, clothes become dry.
However, if your clothes have stopped becoming dry even though all the parts are still working (the drum spins and the clothes get warm) then the most likely culprit is a lint clog. If lint stops the flow of warm, moist air out of the dryer, then that moisture is trapped and the clothes can’t get dry. But lint clogs aren’t always as easy to find and solve as you might think. There are several places where lint can hide in your dryer, some in places you wouldn’t expect or think to look.
This article will help you track down that lint clog and clear it out so that your dryer will dry clothes properly again.
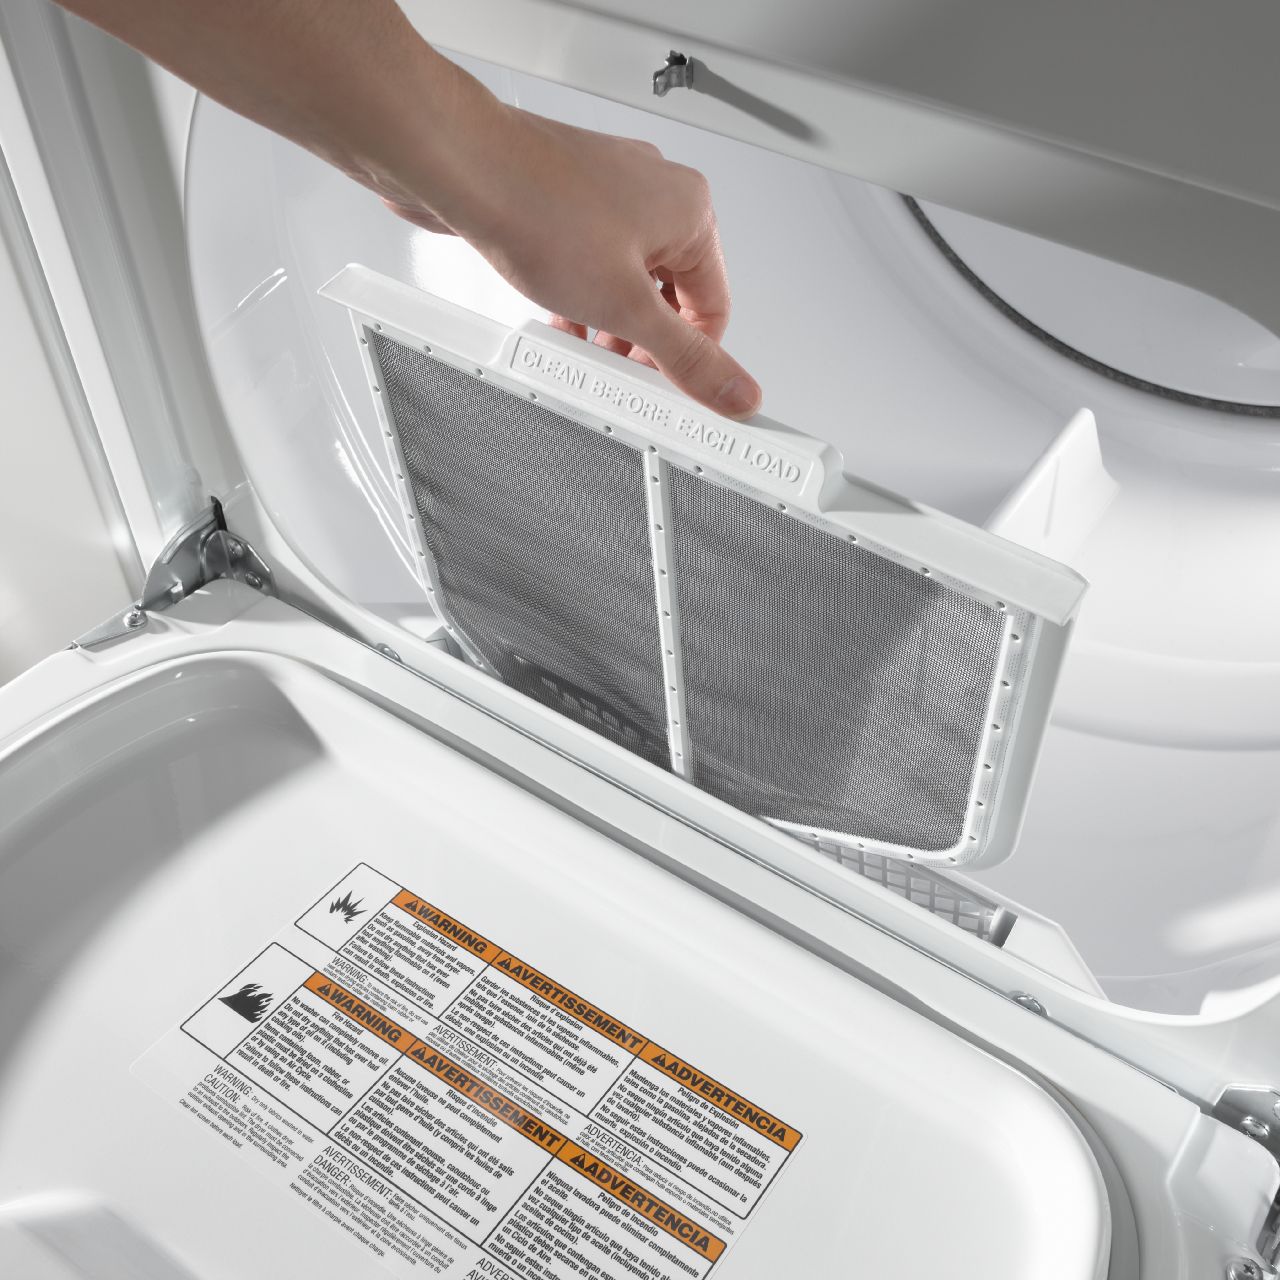
Pull the Lint Screen
The first step, naturally, is to pull out the lint screen. In most dryers, this is either located in the bottom of the door pocket or on the back right corner of the top panel. Most people believe that this is the only place where lint builds up, but lint is a problem throughout the dryer venting system. The lint screen is just your best bet for filtering lint out of the system before it becomes a system-wide problem.
If the lint is thick enough to be fabric, you’ve waited too long to clear it and this could be part of your airflow-related troubles. It’s important to pull and clean the lint screen every one to three dryer loads.
Clear the Lint Housing
Beneath the lint screen aperture is the lint housing. This is the special channel that pushes air through the screen to catch the lint. If your lint housing is not ideal of if your lint screen is rarely cleaned, the housing can become full and clogged with lint. When this happens, airflow in your dryer is reduced and more lint is directed out the vent where it can cause further problems.
Look inside the lint housing with the screen removed, use a flashlight if necessary. If you can see a build-up or reservoir of lint, you’ll need to clear it out. A combination of tools has been found helpful in this situation. Wire coat hangers, vacuum hose attachments, long pliers, and strips of velcro have all been used to help clear the narrow but lint-packed lint housing when it gets clogged. It may also be possible to take apart the housing to gain better cleaning access.
Disconnect the Duct on the Dryer End
Once you’ve fully delved the depths of the lint housing, check how your dryer’s airflow is doing. If it’s still drying slow, it’s time to look at the duct. The dryer duct is the long (or short) wide tube that leads out of the back of the dryer into a designated dryer vent. This tube is usually made or ridged flexible foil and may coil behind the dryer.
If lint catches in the dryer duct enough to cause clogging, you’ll need to clear it out. To do this, remove the fastening ring around the vent and dryer-side connection and pull the duct free. Shake out the duct into a trashcan. Then reach in and pull out handfuls of lint until the duct is relatively clear. If you can’t reach the entire length of the duct, that’s alright. You can disconnect it at the other end to do so.
Disconnect the Duct on the Vent End
With the dryer duct cleared from one end, go ahead and clear from the other end as well. Your dryer duct most likely connects to a vent aperture behind, beside, or above your dryer. This is where hot, moist air from the drying clothes is supposed to escape safely outdoors. It can get clogged with lint at multiple points. So be sure to disconnect the dryer duct from the vent and check it from both ends. Clear all large clumps and duct-wall buildup.
Clear, Cut, or Replace the Duct Length
When you’re clearing the duct, you may find reason to alter, repair, or replace the duct itself. You may have found a rip in the flexible foil duct or decide that the duct is too dirty and you’d rather replace it. A common decision is to shorten the duct so that there is less to coil and create catches for lint.
Whether you’re replacing the duct, you’ll need to decide on the duct length and cut it correctly. A shorter duct is better for clear airflow and preventing lint clogs, but remember to leave yourself some slack in case you need to move the dryer forward to get behind it.
To replace the duct, simply remove the old duct, cut new duct (or the existing duct) to your preferred size, and attach each end with the ring clamps that held the old duct in place.
Clear the Vent Intake
The next step is to take a close look at the vent intake. With the duct disconnected from the vent, look to see if the vent itself is packed with lint. If it is, carefully remove the clumped lint and then wipe down the inside of the vent. Dryer vents sometimes have a screen or filter meant to catch lint that may need periodic cleaning, or the vent itself can simply become so packed with lint that air can’t flow through.
Clear the Vent Outdoors
Finally, track down the dryer vent location outside the home. The vent is vital for controlling in-home temperature and humidity, and it’s important that the warm-moist air from the dryer isn’t released inside the house. This is the purpose of the dryer vent in the first place. Find where your dryer vent lets out and inspect the aperture. If you’re still having dryer airflow troubles after all other steps, there’s a good chance that lint has built up on this final piece of the system.
In fact, the outdoor vent for the dryer is a common place for lint to accumulate because they are often protected by a grate. The grate prevents small creatures from getting into the house, but it can also stop outgoing lint and cause a buildup. Be sure to clear the outdoor vent periodically if you see even one instance of this problem because that means your vent is prone to grate-related lint buildup.

Apr. 09, 2024
Your Guide to Whirlpool Microwave Replacement Parts

Apr. 09, 2024
What to Do When Your Kenmore Dryer Won’t Start

Apr. 09, 2024
How to Resolve the LG Washer LE Error Code

Mar. 06, 2024
Why Does My Oven Smell Like Gas? Causes and What to Do

Mar. 06, 2024
Maytag Dryer Not Heating? Here’s How to Fix It

Mar. 06, 2024
6 Common Reasons Your Speed Queen Dryer Isn’t Heating

Feb. 05, 2024
8 Reasons Your Samsung Refrigerator Is Not Cooling

Feb. 05, 2024
9 Most Reliable Washer and Dryer Brands

Feb. 05, 2024
How to Get Ink out of Your Dryer the Easy Way

Jan. 03, 2024
Why Is My Fridge Making Noise That Stops When the Door Is Open?

Jan. 03, 2024
Frigidaire Refrigerator Error Code H1: Causes & Solutions

Jan. 03, 2024
How to Clean a Dryer Vent Without Moving the Dryer

Dec. 11, 2023
9 Reasons Your LG Refrigerator Isn’t Cooling

Dec. 11, 2023
LG Refrigerator Not Making Ice? Here’s What To Do!

Dec. 11, 2023
How to Clean Your Dryer Lint Trap (Step-by-Step)
631 - 286 - 7899Text or ring! ring!