

June 8, 2019
Frigidaire Repair
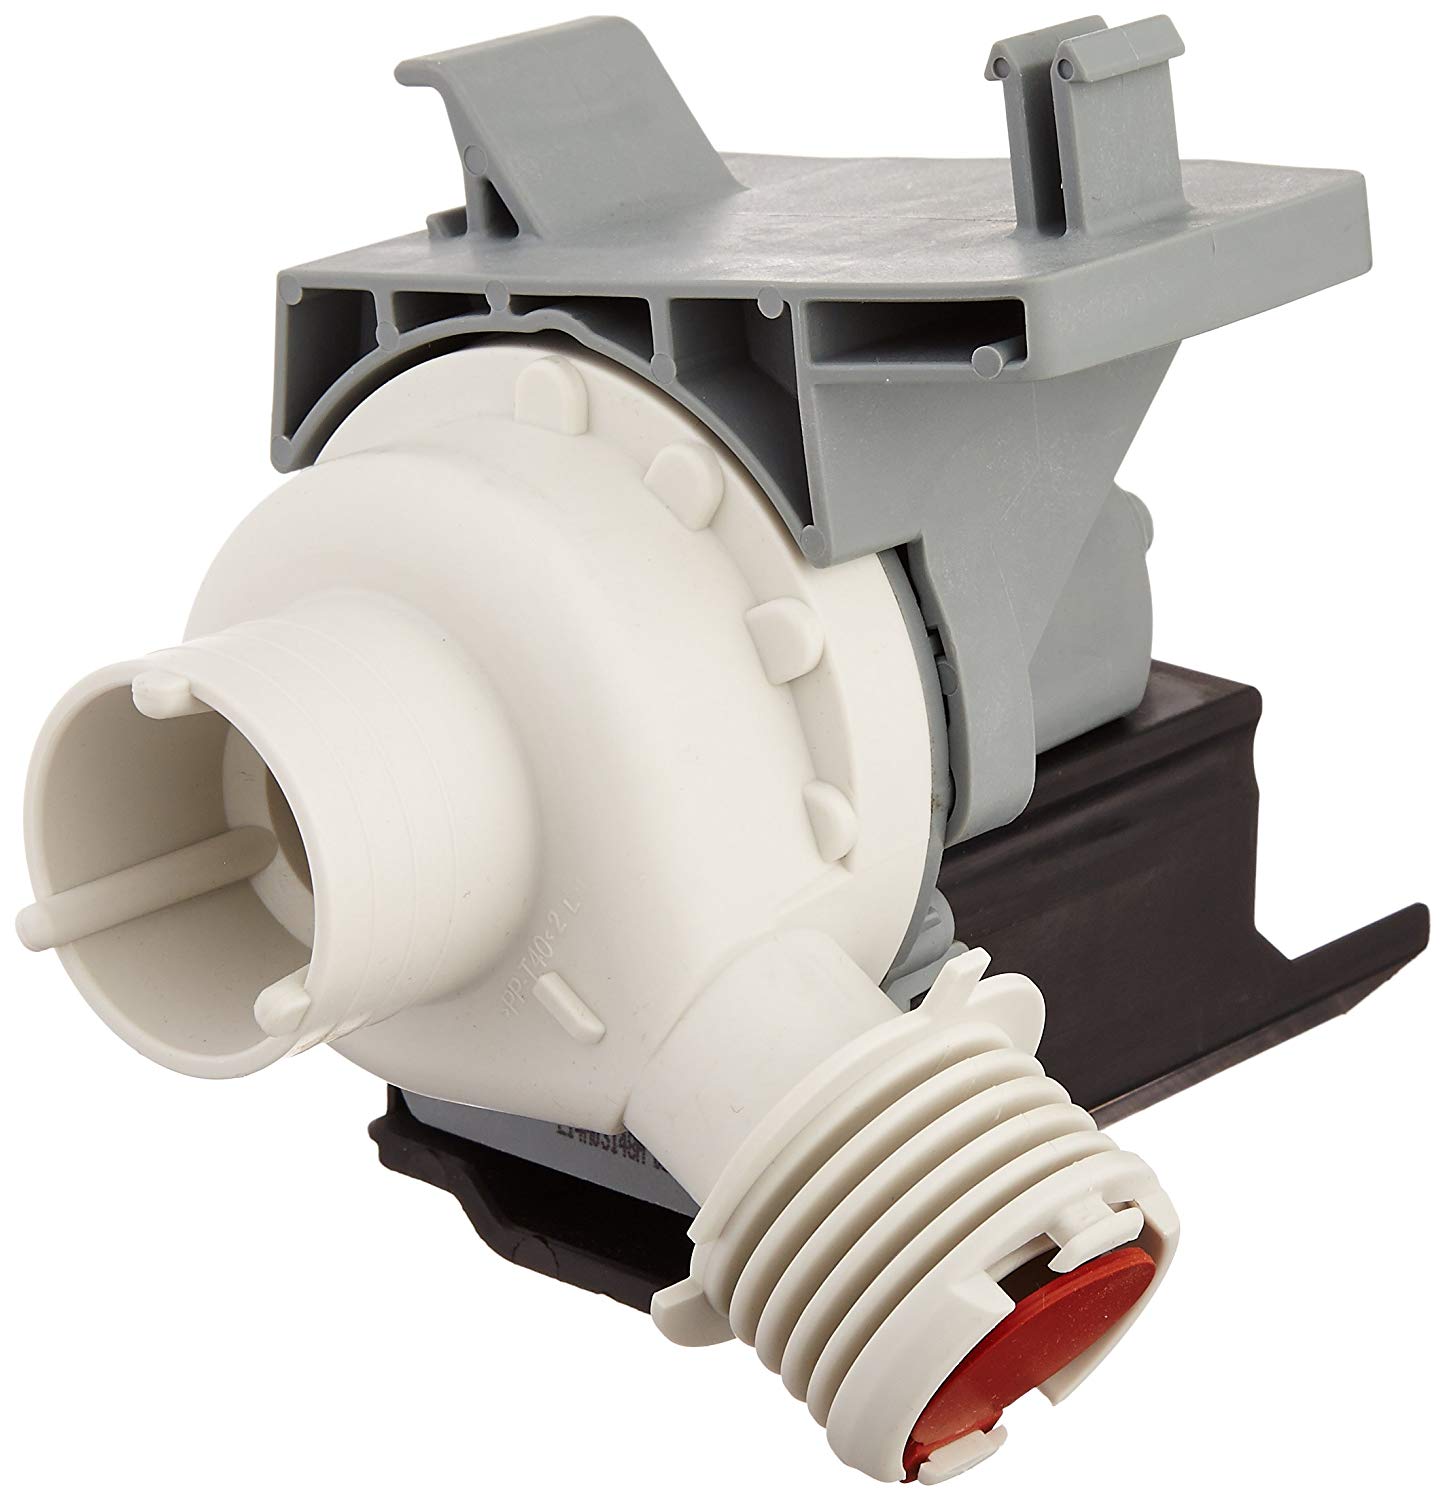
Your washing machine moves a lot of water during every washing cycle. The drain pump pushes that water out during the washing and spinning cycles. But if your tub still has dirty water in it after the cycles are complete, there are two likely causes. Either the drain pump filter is clogged (and you can clean it by following these steps), or the drain pump has stopped working. If it’s the second, that’s still a repair you can make on your own. Order replacement part #137240800 for a new drain pump for your Frigidaire washer and then follow these steps to get it installed.
1. Unplug your washer and turn off the water supply.
Before you start disassembling your washer, unplug it to mitigate the risk of electrical shock. Also, turn off your local water supply to the washer. You will be disconnecting hoses throughout the repair, and the water needs to be off so it doesn’t flood your house.
Once the water is turned off and the power cord is bundled out of the way, start by detaching the hot and cold hoses on the back of your washer. Loosen the nuts at the back panel and let the hoses sit in a bucket or container to collect any lingering water. Also, disconnect the drain hose or pull it out of the wall. This will let you pull the washer away from the wall so you have plenty of room to work.
2. Disassemble the top and front of the washer.
To start, you need to remove the top access panel and the control panel along the top.
First, remove the top access panel. Remove the screws along the back of the panel and slide it slightly back to free the front edge from the securing lip. Lift the panel up and set it aside.
Next, go to the front of the machine and pull out the detergent dispenser drawer on the left side of the control panel. Push down the tab in the back to completely remove the dispenser drawer and set it aside. Once it’s out of the way, remove the three screws that sit in the housing next to the drawer.
After that, remove the two screws that secure the top back corners of the control panel to the frame of the washer. Pry the top of the panel free from the locking tabs and tilt the panel forward to disconnect the wire harness on the right side before setting the control panel aside.
This lets you move on to removing the front panel.
For this part, open the washer door so you can see the screws and seal. Remove the outer door seal clamp by lifting up the bottom edge of the boot seal and prying out the bottom of the clamp with a flathead screwdriver. Once the bottom is out of the groove, you should be able to pull out the clamp and set it aside. Then pry up the outer edge of the seal. It should be completely detached from the front panel (but not the whole tub). Push it back out of the way of the door and close it. Next, tilt the whole machine back and slide a wooden block or brick under the front edge so the machine sits at an angle. This lets you more easily access the four screws along the bottom that secure the front panel. Once the screws are gone, set the machine back down on the ground. Also, remove the screws along the top of the panel. Now you can lift up the panel and set it aside.
3. Remove the old drain pump.
Locate the drain hose and pump in the bottom right corner under the tub. Compress the ends of the wire clamp around the black hose to loosen it and shift it to the right out of the way. Then pull the black hose off of the assembly. Do the same thing with the wire clamp that attaches the white or blue drain hose on the left. Both of these hoses will have water in them, so have a plastic container and towel ready to sop up the water and hold the end of the hose.
Remove the drain pump assembly by loosening the bolt that holds it to the bottom of the washer. The drain pump is also secured to the bottom by two locking tabs, so grab the part carefully and wiggle it free. Don’t pull the part too far away from the washer; it’s still connected to the machine by the wires. Remove the green wire harness in the back. Now you can set the old part aside.
4. Install the new drain pump.
Orient the new drain pump so the plug is on the left and the white hose end faces to the back. Plug in the green wire harness and press the drain pump into place against the locking tabs. You should be able to hear the tabs click into place. Also, secure it by retightening the bolt that connects to the washer floor.
Next, push the end of the drain hose over the white assembly and secure it in place with the wire clamp. Also, reattach the black hose to the right side and clamp it in place. Make sure the small cutout in the edge of the black hose lines up with the tab on the drain pump.
5. Reassemble the washer.
First, reattach the front panel. Set the front panel flush against the front of the machine and secure the top in place with the screws along the top edge. Then set the machine at an angle on top of the brick or wooden block again so you can retighten the bottom screws. Set the machine back down when the front panel is secure.
Next, open the washer tub door and push the edge of the seal back into place around the groove of the front panel. Reinsert the outer door clamp by setting it into place along the left side of the circle. Make sure the spring is at the bottom of the opening. When the tension is too high to press the wire clamp back into place on the right side, carefully extend the spring at the bottom so there’s enough give to finish positioning it. Once the clamp is in place, you shouldn’t be able to see it and you should be able to tug at the seal without it moving.
After that, set the control panel at a ninety-degree-angle next to where it sits. Plug in the wire harness and then tilt the control panel so it’s flush with the washer. snap it into place and secure the back two corners with the screws. Also, add back the screws around the dispenser drawer Slide the detergent drawer back into place.
Then reinstall the top panel. Set the panel on top of the washer and then slide it toward the front of the machine until it snaps into place. Retighten the screws along the back edge of the top panel. Now that the washer is completely reassembled, add back the hot and cold water lines. Make sure you attach each line to the correct port. Also, reattach the drain hose or push it back into the wall. Plug your machine back in and run a trial cycle to check for leaks or standing water.
If you want an experience appliance technician to take a look at your washer instead, contact us at Fleet Appliance to schedule an appointment.

Apr. 09, 2024
Your Guide to Whirlpool Microwave Replacement Parts

Apr. 09, 2024
What to Do When Your Kenmore Dryer Won’t Start

Apr. 09, 2024
How to Resolve the LG Washer LE Error Code

Mar. 06, 2024
Why Does My Oven Smell Like Gas? Causes and What to Do

Mar. 06, 2024
Maytag Dryer Not Heating? Here’s How to Fix It

Mar. 06, 2024
6 Common Reasons Your Speed Queen Dryer Isn’t Heating

Feb. 05, 2024
8 Reasons Your Samsung Refrigerator Is Not Cooling

Feb. 05, 2024
9 Most Reliable Washer and Dryer Brands

Feb. 05, 2024
How to Get Ink out of Your Dryer the Easy Way

Jan. 03, 2024
Why Is My Fridge Making Noise That Stops When the Door Is Open?

Jan. 03, 2024
Frigidaire Refrigerator Error Code H1: Causes & Solutions

Jan. 03, 2024
How to Clean a Dryer Vent Without Moving the Dryer

Dec. 11, 2023
9 Reasons Your LG Refrigerator Isn’t Cooling

Dec. 11, 2023
LG Refrigerator Not Making Ice? Here’s What To Do!

Dec. 11, 2023
How to Clean Your Dryer Lint Trap (Step-by-Step)
631 - 286 - 7899Text or ring! ring!