

April 22, 2019
Dishwasher Repair
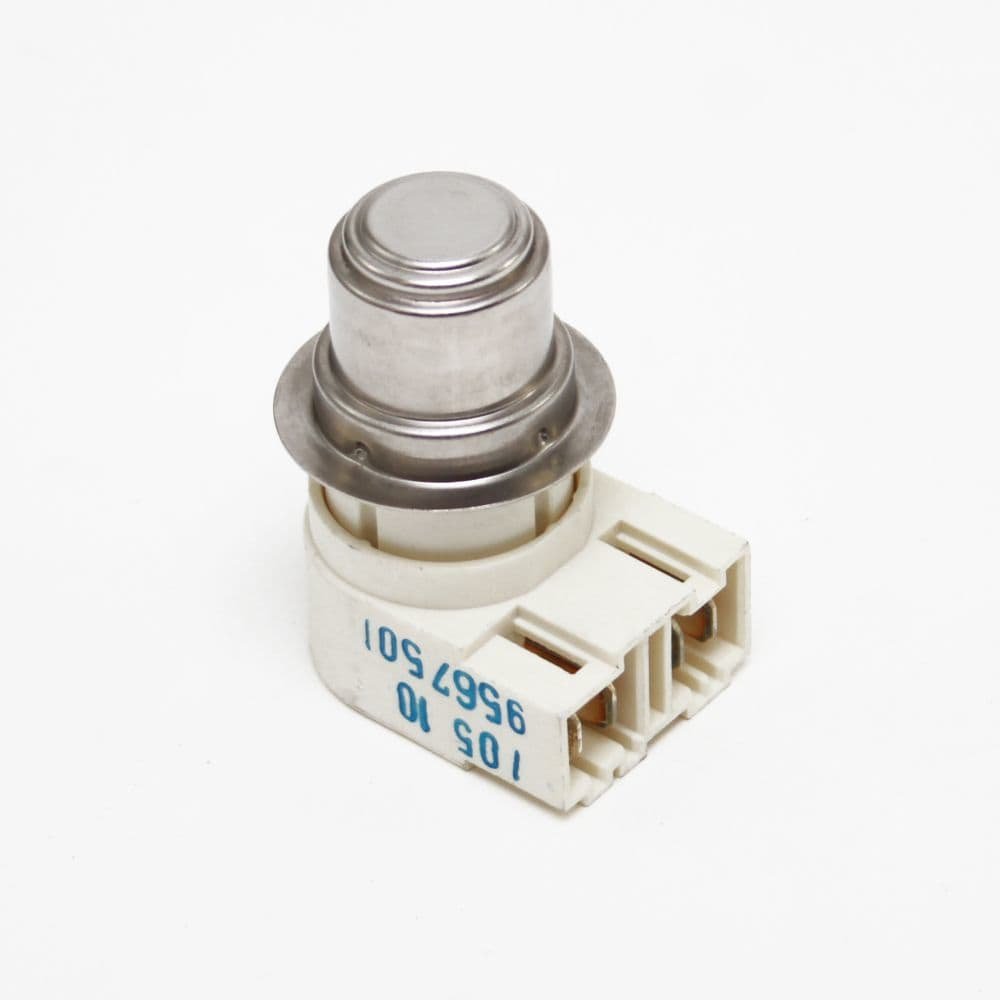
Dishwashers need to use hot water to effectively clean dishes. The temperature sensor with a hi-limit thermistor monitors the water temperature to stop it from getting too hot. It can shut off the heating element if the gets too high to keep the machine and surrounding area safe. But if the sensor shorts or breaks, it can’t regulate the temperature in either direction. If the water is getting too hot or isn’t heating at all, it may be time to replace the sensor. Order replacement part #00165281 for your Bosch dishwasher and follow these steps to replace it.
1. Unplug the appliance and turn off the water.
Before you start any repairs on an appliance, always make sure it’s unplugged or the corresponding circuit breaker is flipped. This keeps you, the appliance, and the surrounding area safe. During the course of this repair, you will also need to uninstall the dishwasher, so shut off the local water connection first.
2. Uninstall the dishwasher.
Remove the lower access panel. To do so, loosen the screws on either side and set them aside. Also, set the panel aside.
Open the door and set it flat. Pull out the lower dish rack and set it aside to keep it out of the way for later steps. Remove the six screws around the perimeter. Then carefully close the door. Slide the outer door panel down to release it and set the panel aside.
Next, locate the two screws securing the plastic bracket and inner access panel right above the lower panel. Set the parts aside. Disconnect the water line and the drain hose under the sink. Remove the screws holding the under-counter brackets secure. Pull the dishwasher out.
3. Disassemble the dishwasher.
Locate the side panels at the bottom of each side of the dishwasher. Remove the screws that secure each cover and then set the covers aside.
Now you can remove the plastic hinge covers and hinge hooks on each side. The hinge covers can just be pulled away by hand. For the hinge hooks, use needle nose pliers to grab the wire below the plastic attachments and pull them back and down off the hinges. They have a lot of tension, so move them carefully.
The dishwasher rests on a white frame. Remove the four screws (two in the front and two in the rear) that secure the dishwasher to the base.
Next, remove the lower spray arm assembly. To start, pry the lower spray arm out of the base and then set it aside. Twist the filter basket below counterclockwise to pull it out. Also, remove the large filter that sits in the square depression. Then remove the spray arm support and sump housing by removing the two screws next to the central shaft. Also, remove the two screws and brackets attached to the white sump below.
Carefully set the dishwasher on its back without pinching any hoses or cords. Once it’s on its back, you can start to remove the circulation pump assembly. This is where the temperature sensor with the hi-limit thermistor is housed.
4. Remove the circulation pump assembly.
First, locate the white water inlet to sump hose on the left-hand side of the bottom of the dishwasher. Pull the hose out of the white sump assembly and the retaining clip, and then twist it out of the way. Next, wiggle the white base lower on the bottom of the dishwasher. During the previous step, you loosened everything that secured the base tightly in place on the appliance, so it should come down a few inches with a bit of pulling. The base won’t come completely off; you just need more space to pull out the assembly.
After that, remove the boxy drain pump that lives behind the inlet hose. To remove it, you’ll need to press in the retaining tabs and twist it clockwise until it snaps free. Pull it out and set it down inside the machine. Then press down the retaining tabs at the circulation pump (by the collection of wires) and the sump. Also, release the drain outlet hose from the sump and let it stay inside the base. Now you can remove the sump and circulation pump assembly from between the base and the body of the dishwasher. It’s still connected to the appliance through its wiring, so just set it on top of the dishwasher door instead of setting it aside.
5. Replace the temperature sensor with the hi-limit thermistor.
Locate the temperature sensor. It’s covered in a box cover and has red and blue wires attached to it. To start replacing it, remove the cover. Then disconnect the two plugs from the sensor. Pull the temperature sensor out of the assembly by depressing the locking tabs and tugging the part free.
Remove the black o-ring from around the metal part of the sensor and slide it into place over the new sensor. Now you can install the new part. Use your finger to apply some soap around the metal portion and o-ring so it slides into place more easily, and then push it into the opening in the circulation pump housing. Make sure you hear the locking tabs engage and that the sensor is oriented with the wire ports to the left.
After that, plug in the two wire connectors. The plug with the two red wires should go in the top terminal port. The blue and orange wires go into the bottom port. Next, reinstall the cover by snapping it in place.
Wash the gasket and the gasket seat while the parts are accessible.
The untreated buildup can eventually displace the gasket and cause future malfunctions.
6. Reassemble the base of the dishwasher.
First, make sure the gasket is firmly in the seating. Then orient the sump and circulation pump assembly so the gasket side faces the drum of the dishwasher. Slide it between the base and the dishwasher. Make sure the opening the gasket fits around sits against the bottom of the dishwasher drum and slide the mounting straps around the tabs at the front of the assembly and near the large collection of wires.
Reconnect the sump outlet hose by pushing the hose firmly into the sump. Also, reattach the boxy drain pump by inserting it into the large hole above the sump outlet hose and twisting it counterclockwise.
Next, push the base back into place against the dishwasher without pinching any of the hoses or wires. At the same time, make sure the circulation pump assembly’s gasket sits in place against the bottom of the dishwasher body for a tight waterproof seal. You should hear all of the corners of the base snap into place.
After that, twist the water inlet hose back around and push it into the front of the assembly. Slide it behind the retaining clip to secure it in place, too.
Now you can carefully tilt the dishwasher back so it’s right-side-up. Resecure the base with the four screws you removed earlier.
7. Reassemble the dishwasher.
First, resecure the sump and spray arm inside the machine. Open the door. Add back the two sump supporters and screws that were removed earlier. Reattach the two spray arm support screws, too. Add back the two filter, and then click the spray arm back into place over the central mount. Slide the lower dish rack back into place and shut the door.
Next use needle nose pliers to reattach both hinge hooks into place to secure the door. Also, snap the hinge covers back into place by hand. On each side, slide the bottom side covers into place and secure them with the screw near the front of the dishwasher.
8. Reinstall the dishwasher.
Slide the dishwasher back under the counter. Open the door again and resecure the dishwasher in place by screwing the brackets against the underside of the countertop. Shut the door. Next, reattach the inner access panel and plastic bracket that lives behind the exterior door panel. Secure these parts with the two screws. After that, slide the exterior door panel up into the groove behind the control panel. Press down the bottom corners until they click into place. Then open the door again and add back the six screws along the perimeter of the door interior. Then reattach the lower access panel and secure it with a screw on each side. Reattach the water and drain lines, and plug the machine back in.
Now that the repair is complete, turn the machine on for a trial run to check for any leaks. For more appliance repair procedures, go to Fleet Appliance. You can also contact our teamto set up an appointment with one of our trained appliance repair technicians.

Apr. 09, 2024
Your Guide to Whirlpool Microwave Replacement Parts

Apr. 09, 2024
What to Do When Your Kenmore Dryer Won’t Start

Apr. 09, 2024
How to Resolve the LG Washer LE Error Code

Mar. 06, 2024
Why Does My Oven Smell Like Gas? Causes and What to Do

Mar. 06, 2024
Maytag Dryer Not Heating? Here’s How to Fix It

Mar. 06, 2024
6 Common Reasons Your Speed Queen Dryer Isn’t Heating

Feb. 05, 2024
8 Reasons Your Samsung Refrigerator Is Not Cooling

Feb. 05, 2024
9 Most Reliable Washer and Dryer Brands

Feb. 05, 2024
How to Get Ink out of Your Dryer the Easy Way

Jan. 03, 2024
Why Is My Fridge Making Noise That Stops When the Door Is Open?

Jan. 03, 2024
Frigidaire Refrigerator Error Code H1: Causes & Solutions

Jan. 03, 2024
How to Clean a Dryer Vent Without Moving the Dryer

Dec. 11, 2023
9 Reasons Your LG Refrigerator Isn’t Cooling

Dec. 11, 2023
LG Refrigerator Not Making Ice? Here’s What To Do!

Dec. 11, 2023
How to Clean Your Dryer Lint Trap (Step-by-Step)
631 - 286 - 7899Text or ring! ring!